
Fun fold cards are a lot of fun to create and to recieve, but some can be overwhelming to create. Not this one, though! This Easel Fun Fold Card is so easy to create with minimal supplies. So long as you have cardstock, a Paper Trimmer with cutting and scoring blades, then you are good to go. Then you can embellish as you wish.
The front layers can be created with different shapes, but I kept this one simple with rectangles.

- First stamp your chosen stamp in Memento Tuxedo Black ink onto the Basic White cardstock layer and allow the ink to dry. I have used the Sale-A-Bration Handmade Designs stamp set. This stamp set is FREE when you join Stampin' Up!® during Sale-A-Bration, until 28th February 2025. Also as part of the Option 1 Join offer, you can choose two sets of the Stampin' Write Markers™ Colour Collections.
- Using the brush tip of the Highland Heather Stampin' Write Marker from the Subtles collection, draw a squiggly/sketchy line around the inside of all of the line art detail on the flower petals.
- Next use the brush tip of the Fresh Freesia Stampin' Write Marker from the Subltes Collection to fill in the colour of the flower.
- Use the brush tip of the Granny Apple Green Stampin' Write Marker from the Brights Collection to colour the leaves.
- Next take your chosen colour of Stampin' Write Marker and colour over the sentiment on the red rubber Cling Stamp. Once coloured, huff your breath onto the stamp 2-3 times to re-moisten the ink and stamp immediately onto the sentiment label piece.
- Punch the ends of the sentiment label if desired, using the Happy Labels Pick A Punch.
- Use the side of your Highland Heather Stampin' Write Marker to run ink around the edge of the sentiment label to create a border.
- Colour the White Baker's Twine using the Highland Heather Stampin' Write Marker, using the side of the brush tip. Be sure to have scrap paper under the twine as you colour and rotate the twine to colour all edges. Set aside to dry or use Heat Tool on setting 1 to gently dry the Baker's Twine.
- To create the Easel Fun Fold card base, follow the measurements below. The sentiment label will become the "stopper" to hold the easel in place.
- For my card layers I chose the Subtles and Regals 6" x 6" Designer Series Paper to coordinate with the Subtles and Regals Stampin' Write Markers™ that I used to colour the stamped image and sentiment.
- Add the patterned Subtles Designer Series Paper pieces to the front easel panels.
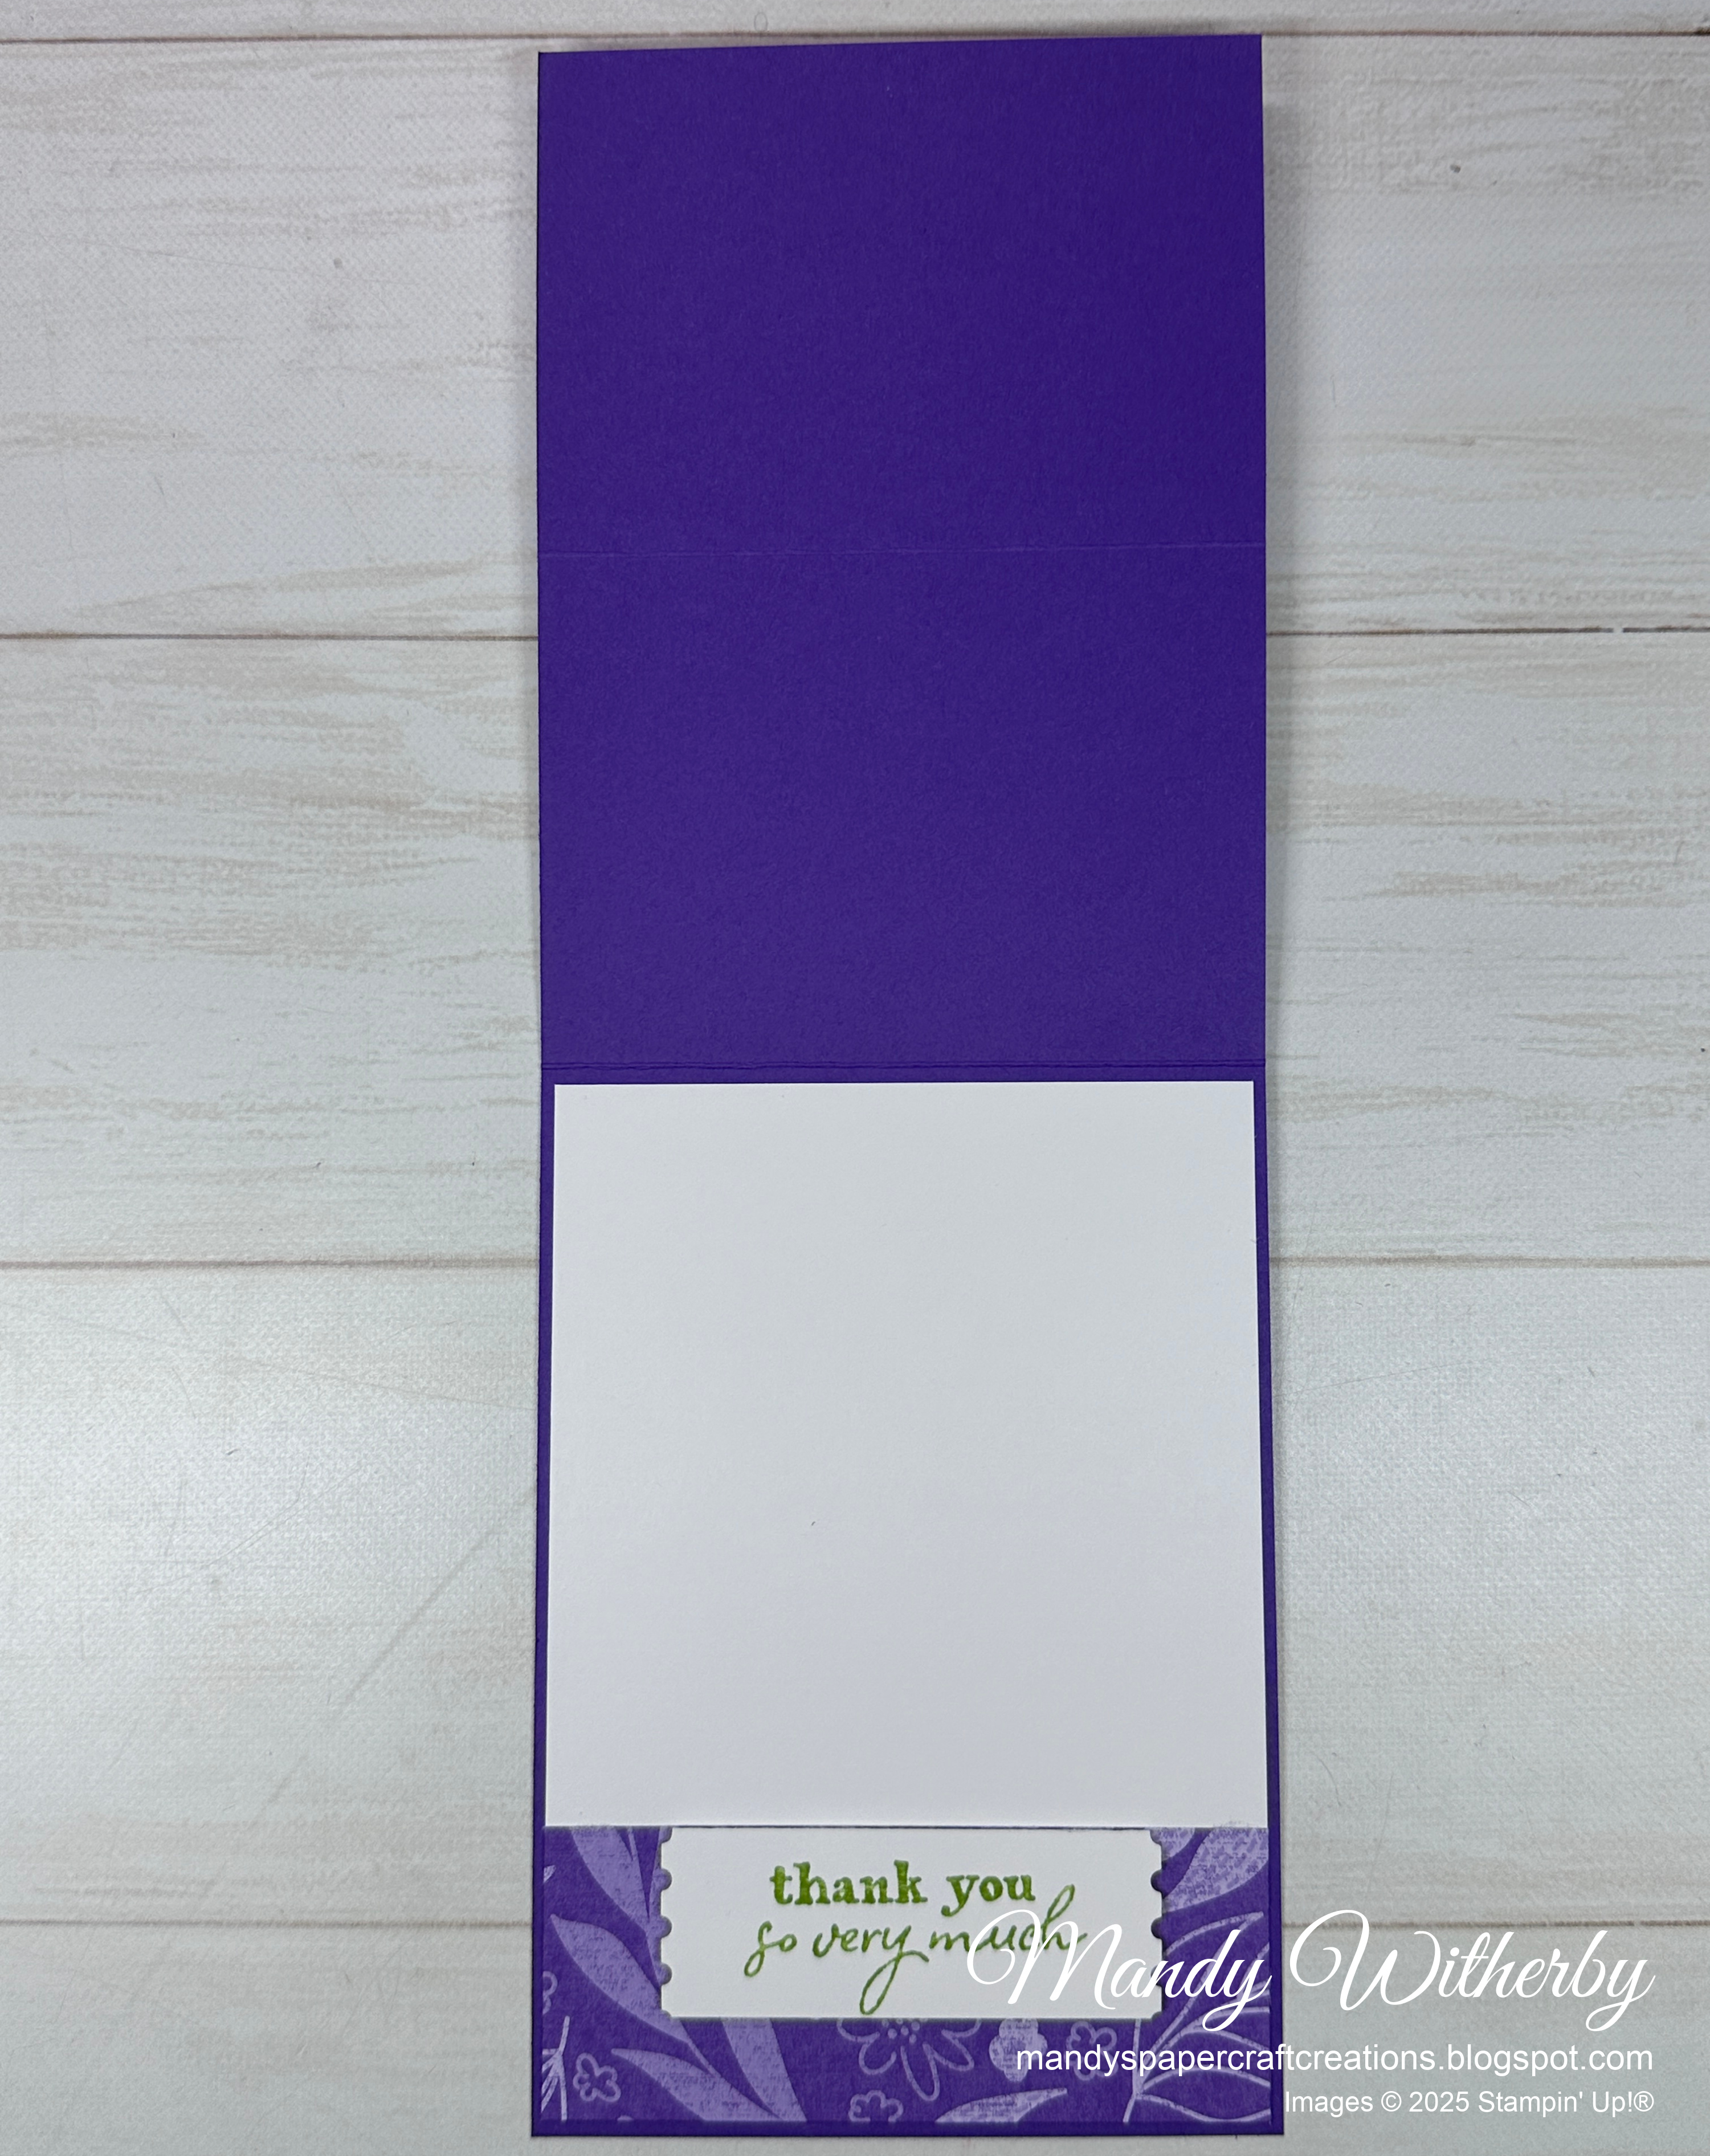
- Adhere the Basic White insert to the inside of the card, then add the patterned strip to the bottom edge.
- Turn the card over and stamp the Handmade by stamp on the back of the Gorgeous Grape cardbase with the Gorgeous Grape Classic Stampin' Pad or Stampin' Write Marker.
- Die cut the Granny Apple Green Cardstock with the second largest rectangle from the Perennial Postage Dies.
- Adhere the striped Gorgeous Grape Designer Series Paper to the Granny Apple Green layer using Multipurpose Liquid Glue.
- Centre these two matted layers on the card front and adhere them to the bottom panel of the easel card front using Stampin' Dimensionals, ensuring that the Dimensionals do not go above the centre fold (see video).
- Adhere the sentiment label to the inside Designer Series Paper using Stampin' Dimensionals, aligning with the top edge of the Designer Series Paper to form the stopper.
19. Adhere the stamped panel to the striped Designer Series Paper using Stampin' Dimensionals.
20. Add three silver Drusy Adhesive-Backed Embellishments.

Full product list for my card and direct shopping link can be found HERE.
Measurements
Card Base - Gorgeous Grape - 29.7cm x 10.5cm, scored and folded at 14.85cm & 7.4cm
Front Layers - Patterned Highland Heather Subtles Designer Series Paper - 10.1cm x 7cm (cut 2)
Layer - Granny Apple Green Cardstock - 9cm x 12.5cm, die cut with second largest Perennial Postage Die
Layer - Striped Gorgeous Grape Regals Designer Series Paper - 7.5cm x 10.5cm
Stamped Layer - Basic White Cardstock - 6.5cm x 9.5cm
White Bakers' Twine - 60cm
Insert - Basic White Cardstock - 10.1cm x 14.45cm
Insert - Gorgeous Grape floral Regals Designer Series Paper - 10.1cm x 4cm
Sentiment label (stopper) - Basic White Cardstock - 7.5cm x 2.5cm
Another fun way of colouring with your Stampin' Write Markers is to use the "Smooshing Technique" to create a watercoloured background. Dry it completely with your Heat Tool on the number 1 setting, then stamp your image over the watercoloured background in Memento Tuxedo Black ink or desired colour.
See the end of my video below for how to create with this technique (from 1:17:10).

I hope my project has inspired you in your creativity and encouraged you to consider creating an Easel Fun Fold Card with your supplies.
If you would like to choose the Handmade Designs stamp set and two of the Stampin' Write Marker packs for FREE (valued at $162), join Stampin' Up!® during Sale-A-Bration, until 28th February 2025.
Ask me about joining my team in Australia or click HERE. We would love to welcome you.

*** When shopping with me, remember to use my current Host Code when your order is over $75 AUD, to receive a thank you gift from me. You will find my current Host Code at the top right side of my blog page.
FEBRUARY 2025 Host Code is 2PD6VD7K
If your order is over $250 AUD, don't use the Host Code, as you will receive Stampin’ Rewards from Stampin' Up!®. Be sure to claim them before you check out.

Receive the current Crafty Collaborations Tutorial Bundle FREE with a $75+ AUD order in my online store, or purchase it from me anywhere in the world for $28 AUD.
Sign up for my Newsletter to keep updated with the latest Stampin' Up!® news HERE and receive a free exclusive tutorial bundle from me.
Request a Stampin' Up!® catalogue from me in Australia on the link below.
Find all my Links HERE.
Thank you so much for stopping by my blog today.
Have a great day and Happy Crafting.
Love Mandy

Comments
Post a Comment
Thank you so much for your comment and for visiting my blog.