It's nearing the end of September and Christmas will be here before we know it. So I figured it is time to get started on those Christmas projects and what a great time to start using our new products from the September-December 2023 Mini Catalogue.
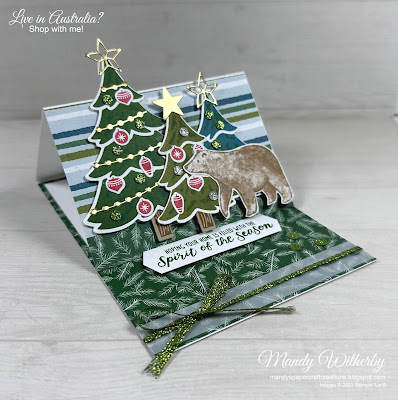
This week I created a really easy Easel Card, using the Merriest Trees bundle and A Walk in the Forest Designer Series Paper.
 |
| Merriest Trees Easel Card |
It's great to jazz up your Christmas cards and give the recipient a lovely surprise by creating an easy to create easel card like this one. This card would look lovely displayed on the buffet or mantle at Christmas time. The easel is basically the card front scored and folded in half and propped up using the sentiment label as a stopper.
I created this card on my Facebook Live this week and you can see the video replay below for all the step by step instructions.
 |
| Merriest Trees Easel Card - the sentiment label becomes the stopper to hold up the easel |
 |
| Front view - Merriest Trees Easel Card |
The trees on my card have been two-step stamped in combinations of Old Olive, Garden Green and Pretty Peacock ink, then die cut with the coordinating Merriest Trees Dies. What I love about the tree stamp is that it is actually a five tiered tree, but can be die cut in tiers of 1-5, so that you can create different sized trees. Brilliant idea, right! Here I have cut the four-tiered tree and two three-tiered trees. The cute brown bear has been fussy cut with Paper Snips Scissors from the A Walk in the Forest Designer Series Paper. The tree decorations are all created from this stamp and die bundle.
 |
| Closed Merriest Trees Easel Card |
 |
| Inside - Merriest Trees Easel Card |
I added a white layer inside for writing a Christmas message. I love that it's a small panel, which means I don't need to write too much. Love that!
Full product list for my card and direct shopping link can be found by clicking HERE.
Measurements
Card Base - Basic White Thick - 10.5cm x 29.7cm, scored and folded at 14.85cm & 7.4cm
Layer - A Walk in the Forest Designer Series Paper Striped - 2 pieces, 10.5cm x 7.4cm
Layer - A Walk in the Forest Designer Series Paper Green Pine Needles - 10.5cm x 1.5cm
Inside layer - A Walk in the Forest Designer Series Paper Pine Needles - 10.5cm x 14.85cm
Inside layer - Basic White Thick Cardstock - 9.9cm x 8.3cm
Vellum Cardstock Strip - 10.5cm x 1.5cm
Stamped Trees & Baubles - Basic White Thick Cardstock - 20cm x 10cm
Sentiment Label - Basic White Thick Cardstock - 7.6cm x 1.7cm
Gold stars and beaded garlands - Gold Foil Sheet - 8cm x 5cm
Tree trunks - Crumb Cake Cardstock - cut 2 piece, 3cm x 3cm
Brown Bear - fussy cut from A Walk in the Forest Designer Series Paper
If you would like to see how I created this card, you can click on my video below.
I hope my project has inspired you in your creativity and encouraged you to consider playing with the Merriest Trees Bundle and also to create an easel card, or fun fold card.
*** When shopping with me, remember to use my current Host Code when your order is over $75 AUD, to receive a thank you gift from me. You will find my current Host Code at the top right side of my blog page.
SEPTEMBER 2023 Host Code is CZSDXMGZ
If your order is over $250 AUD, don't use the Host Code, as you will receive Stampin’ Rewards from Stampin' Up!®. Be sure to claim them before you check out.
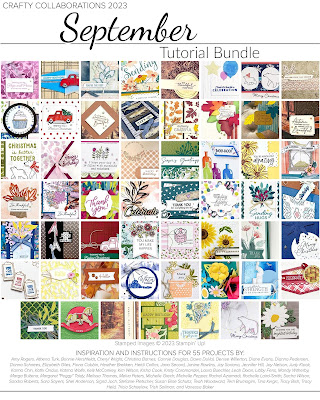
Receive the Crafty Collaborations September 2023 Tutorial Bundle FREE with a $75+ AUD order in my online store, or purchase it from me anywhere in the world for $28 AUD.
Sign up for my Newsletter to keep updated with the latest Stampin' Up!® news HERE and receive a free exclusive tutorial bundle from me.
Request a Stampin' Up!® catalogue from me in Australia HERE.
Find all my Links HERE.
Thank you so much for stopping by my blog today.
Have a great day and Happy Crafting.
Love Mandy


Comments
Post a Comment
Thank you so much for your comment and for visiting my blog.